


The
Calm Creative


The Secret to Cleaner Petals & Zero Paste Waste (Tip #2)
This post contains affiliate links, which means I may earn a small commission at no extra cost to you. I only share what I actually use at my own kitchen table.
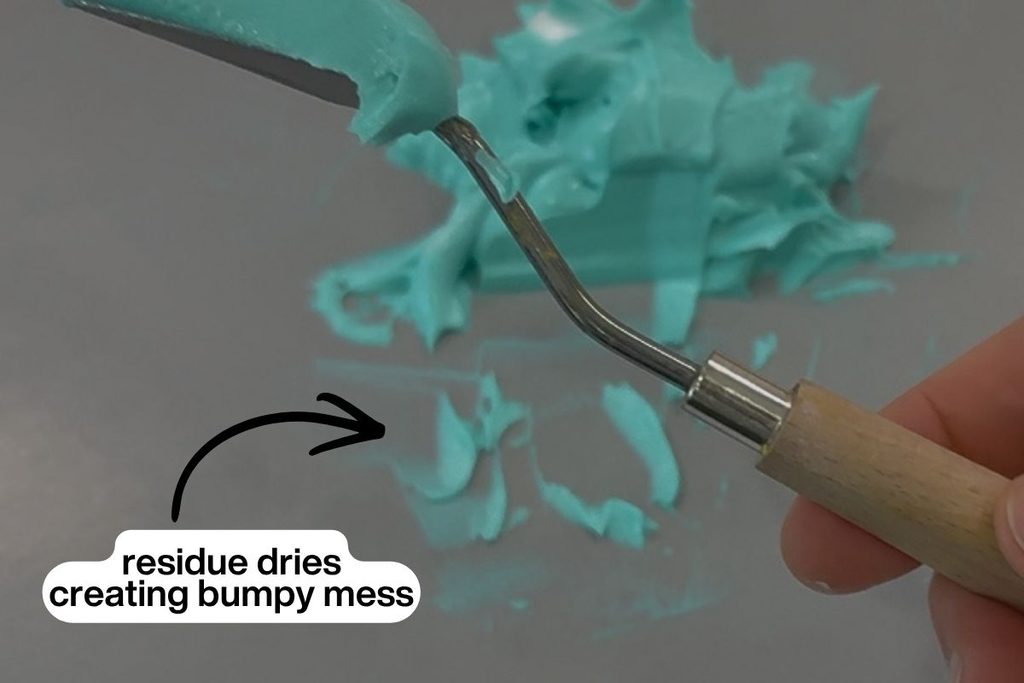
If you have ever loaded up a huge pile of texture paste onto your palette, you already know where this is going. The pile gets hard to work with, your knife keeps sliding through more paste than you actually need, and the leftover residue you push around the edges starts to dry out while you are still painting. Then those dried little bits end up stuck in your petals and suddenly your smooth flower has bumps in it you did not put there on purpose.
The number one mistake beginners make is piling all their texture paste onto the palette at once instead of piping out only what they need for each petal.
The Quick Takeaway: A big loose pile of paste is hard to control, and the parts you are not actively using dry out fast and turn into little bits of debris. Piping your paste out in small controlled amounts keeps your palette clean, keeps your paste fresh, and keeps those dried bits out of your petals completely.
1. Why a Big Pile of Paste Causes Bumpy Petals
When you scoop a large pile onto your palette, you end up spreading it around more than you actually use, and every bit that sits exposed on the edges starts drying almost immediately. That dried paste does not just disappear. It gets picked up by your knife and pressed right into your next petal, which is exactly what creates that bumpy, uneven texture beginners keep fighting.
2. How I Stumbled Onto the Fix
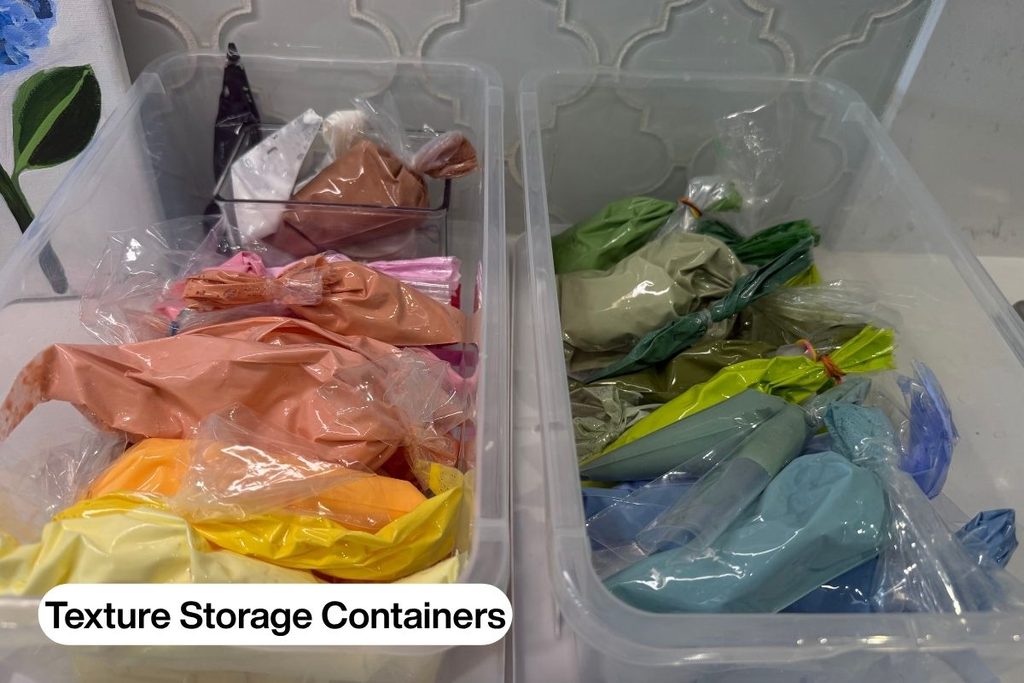
I went through months of frustration before I landed on this. I tried storing my texture in a Pyrex glass container. I tried the bigger plastic restaurant containers too. Neither one worked. They both got messy, and cleaning dried texture paste out of a container is genuinely hard. On top of that, paste along the edges would dry out and I would have to throw it away, which stung because this paste is not cheap.
Then one day I was piping dots into the center of a flower and it hit me. This was not just a better way to store my paste. It was a better way to use it. I could pipe out exactly what I needed straight onto my palette, use it, and pipe out more only when I was ready. Nothing sat around drying. Nothing went to waste.
3. Why This Simple Switch Works So Well
- Keeps your paste fresh. No more crusty edges. Sealed in the bag, it stays soft and usable for much longer.
- Keeps your palette clean. Piping out only what you need means there are no dried bits left to end up in your petals.
- Saves you money. Texture paste is a real investment, and cutting down on waste means it goes a lot further.
4. How to Actually Try It
Step 1: Load your bag.
Grab a standard disposable piping bag from the cake decorating aisle. I buy mine on repeat from Amazon.
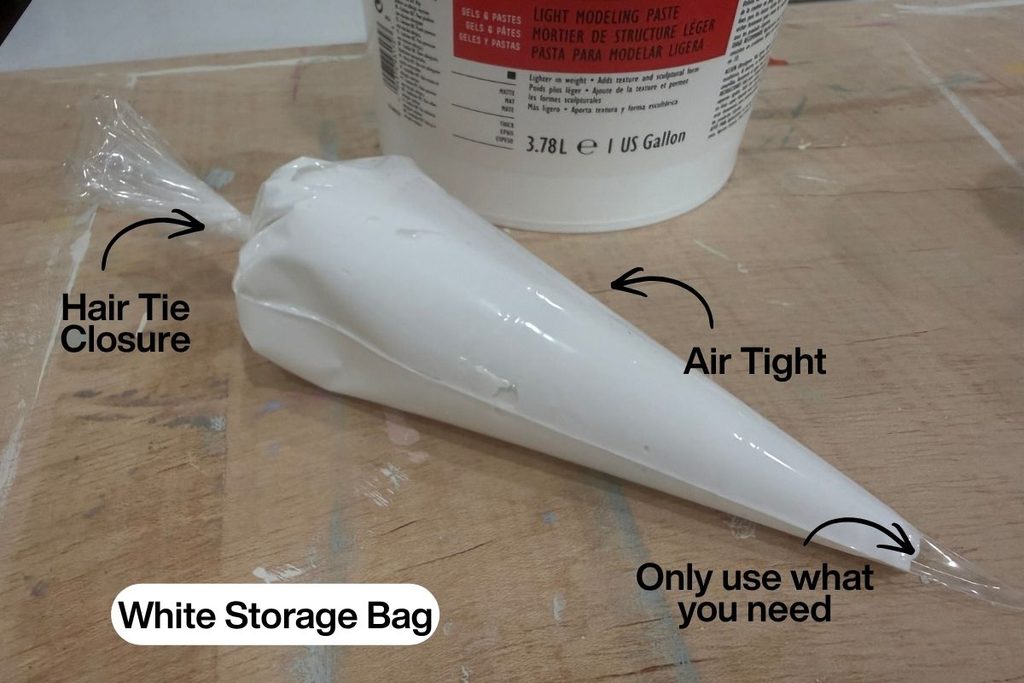
Place the piping bag in a small cup, folding the top over the edge. Using your palette knife, fill it about halfway with texture paste. Take the piping bag filled out of the cup and shake it so that the texture goes towards the bottom tip. Twist the open end shut so nothing can escape and tie with a small rubber band. The Goody’s brand of hair ties works best. They are $1 or 2 more but will not break a week later like the cheaper versions do.
Step 2: Pipe what you need.
Snip a small opening off the tip, about a quarter inch. Apply steady pressure and pipe a small amount straight onto a clean spot on your palette. Use it, then pipe out more only when you are ready for it.
Step 3: Store the rest.
If you are not using the bag right away, skip snipping the tip. Push the air out, twist the top tight, and lay it flat in the fridge or an airtight container. Sealed this way, your paste stays soft and workable for days instead of drying out in an open jar.
Pro Tip: Snip a smaller opening than you think you need. You can always cut a little more off the tip, but you cannot undo a hole that is too big.
Ready to Practice? Let’s Get Started!
Now that you know how to keep your texture clean and manageable, the best way to get a feel for your palette knife is to practice on a guided layout.
Get the freebie: Head to my Flodesk form to grab a free practice template so you can try this technique for yourself.
[Grab your free template here]
Jump into the full course: If you are ready to skip the guesswork and learn the whole process, from buying your first materials to creating a stunning large double flower, my complete step by step digital course is available for $47.


Leave a Reply

@jenlaurentaylor
come hang with me on


